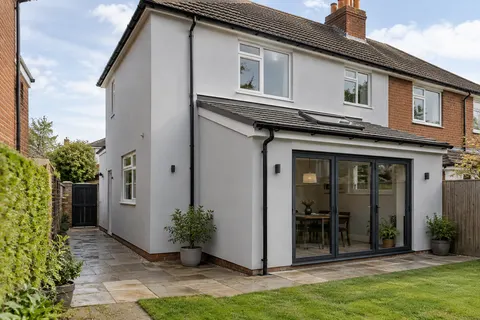
One project with several connected stages
House rendering in Runcorn | Plan the exterior work
A house-rendering project is easier to manage when its stages are clear. Investigation, removal, background repairs and finishing are not the same operation, even if one contractor coordinates them. For a Runcorn property, the scope should show what is known before work begins and what may change once the old surface is opened. This guide follows the decisions through the project so that a new exterior is supported by a suitable wall and a practical sequence.

On this page
Write the starting condition down
Describe each elevation separately. One may have sound retained render, another may carry a damaged coarse covering and a later extension may be bare blockwork. A general instruction to renew the house can conceal those differences. Photographs and a short elevation schedule give the survey a useful structure and make the eventual proposal easier to compare with what is actually on site.
Include earlier repair history where it is relevant. Recurring cracks, detached patches and changes around replaced windows should not disappear from the brief simply because the entire house will receive a new finish. The repair guide explains why those findings may need their own assessment. A wider contract provides access to the wall; it does not automatically resolve the cause of every defect.
- Scaffold and protection Windows, doors, paths and planting are covered; downpipes, lights and satellite brackets come off.
- Old finish tested or removed Failed render is removed; the survey decides whether any sound areas can remain within the specified system.
- Masonry repairs and beads Cracked bricks and open joints are repaired; corner, stop and base beads are fixed.
- Base coats Sand-and-cement scratch and float coats, or a manufacturer basecoat with mesh.
- Finish coat A painted, scraped or thin-coat coloured finish, applied in suitable weather.
- Fittings and junctions Fittings are refixed through the new surface; sills, roofline and abutments are sealed.
The usual order of work. The survey and the chosen products decide the actual steps.
Decide the removal stage before choosing a final appearance
If the existing covering has to come off, agree whether a trial is needed and what it is intended to reveal. The condition beneath may affect the replacement build-up and repair allowance. A pebbledash-removal proposal should describe that uncertainty rather than promise that the exposed wall will be ready for immediate finishing whatever is found.
Where sound material is retained, the specification needs to explain its suitability as a background. Retention is not merely the absence of removal. It can require cleaning, preparation, repairs or a particular supported build-up. Compare those tasks with a full replacement proposal before deciding that one option is cheaper or less disruptive; the actual scope matters more than the label.
Set a review point for the prepared walls
Once the relevant surfaces are exposed or prepared, the project should have a clear point at which the background is reviewed. Identify any changed conditions and agree the necessary work before they are covered. A dated photograph and marked elevation can make the finding understandable to the owner without requiring them to diagnose the construction themselves.
Allocate responsibility for associated defects. Roof junctions, damaged fittings or significant masonry issues may need another trade or specialist input. The programme should allow those dependencies to be resolved. Continuing with the decorative layers simply to maintain the original date can conceal a problem that becomes more difficult to address after the exterior looks complete.
| Stage | Decision before moving on |
|---|---|
| Investigation | Confirm the condition and necessary scope |
| Removal or preparation | Review newly exposed defects |
| Associated work | Complete required roof, window or service details |
| Finish sample | Approve the visible reference |
| Handover | Check reinstatement and retain product records |
Choose finishes for the actual backgrounds
A house can have a coherent appearance without one identical build-up on every face. Silicone rendering and monocouche rendering offer different finish characteristics, while lime may deserve consideration where retained construction calls for a compatible traditional approach. The proposed materials should follow the wall assessment rather than the desire to simplify the quotation into a single product name.
Compare samples alongside the permanent materials, including frames, roof covering and any exposed brick. Decide the intended texture as well as the colour. If an extension and original wall differ, describe how the junction will be formed and where any necessary movement detail remains. A continuous shade does not remove the underlying change of construction.
Coordinate the items attached to the house
Pipes, lights, cables, vents and other fittings can interrupt preparation and finishing. Identify which will be removed, moved or worked around, and who is responsible. A future replacement should also be mentioned if it is already planned. Rendering tightly around a fitting that will soon disappear can leave an unconsidered patch or fixing problem behind it.
Window and roofline work need the same sequence planning. The new finish should meet a completed, suitable detail rather than become a temporary bridge to another trade's unfinished work. Where external insulation is included, show the changed wall position and its consequences. Sills, eaves and service extensions then become part of the complete upgrade rather than incidental extras.
Keep the household's routes realistic
Explain which entrances and garden routes are normally used, where deliveries can arrive and what must remain accessible. The contractor needs room for safe working arrangements, materials and waste as well as the application itself. A driveway that appears generous in a photograph may already serve several daily functions that the programme needs to take into account.
Agree how occupied areas will be separated from the work and how the arrangement changes between elevations. If access from neighbouring land is required, settle it before relying on it. The article on working beside a shared boundary considers the information needed for that discussion without assuming an automatic right to use another person's space.
Review the finished job against the agreed stages
Completion should cover more than the appearance of the principal wall. Check the included returns, openings, roof and base details, reinstated fittings and cleared working areas. Assess the colour and texture after the relevant drying or curing stages, using the approved sample and agreed viewing conditions. Keep outstanding items specific enough for the responsible party to act on them.
Retain the system details, colour reference, repair records and useful photographs. They will help if a later alteration or repair is required. The Runcorn home guide brings the service routes together, while the cost guide explains how to compare the scope behind the price. A completed house-rendering project should leave a clear record of both the visible result and the work that supports it.
Common questions
Must all elevations be completed together?
Phasing can be considered, but it affects access, protection, stopping points and the coordination of appearance. The proposal should describe those consequences rather than assume that a later phase will match the first one automatically.
Can the original house and extension use different specifications?
Yes, if the assessment and design justify it. The important points are compatible treatments for their backgrounds and a suitable junction between them. A common colour can coordinate appearance without requiring identical wall construction.
See housing and planning information for Runcorn and nearby places, including the source and geography behind each figure.